Welcome to our quick guide on creating 3D models using Agisoft Metashape. This post is aimed at beginners and provides straightforward steps to turn photographs into a 3D model. Let’s dive in!
Table of Contents
Getting Started with Agisoft Metashape
Step 1: Opening the Program and Adding Photos
- Initiate: Launch Agisoft Metashape.
- Add Photos: Navigate to
Workflow > Add Photos. Select your desired photos and clickOpen. - Remove Unwanted Photos: If you’ve uploaded photos by mistake, simply select them, right-click, and choose
Remove Items.
Step 2: Checking Image Quality
- View Details: Click the
Change Viewicon and selectDetails. - Estimate Quality: Select all photos (CTRL+A), then go to
Estimate Image Quality > Selected Cameras > OK. - Quality Rating: A quality rating will appear in the photo details. Remove or disable photos with a quality less than 0.5 to ensure proper alignment.
Step 3: Aligning Photos
- Alignment Process: Click
Workflow > Align Photos. Choose your desired accuracy level and check bothGeneric PreselectionandReference Preselectionboxes before clickingOK. - Result: After alignment, a sparse cloud model appears. Save your project at this stage.
Step 4: Adding Scale (pro feature)
- Marking Reference Points: Double-click a photo with clear scale bars or reference points. Right-click on these points and select
Create Marker. - Creating Scale Bar: Under the
Referencetab, select both markers, right-click, and chooseCreate Scale Bar. Enter the known scale distance and accuracy.
Processing the Model
Resizing the Model Region
- Resize Region: Click the
Resize Regionicon and adjust the region corners as needed. - Navigation: Use the navigation bubble to check the region’s height and width.
Building Dense Cloud
- Initiate Process: Select
Workflow > Build Dense Cloud. Choose the desired quality level and start the process.
Creating the Mesh
- Build Mesh: Go to
Workflow > Build Mesh. SelectArbitraryfor Surface Type,Dense Cloudfor Source Data, and choose your desired Face Count.
Adding Texture
- Texture Process: Navigate to
Workflow > Build Texture. SelectGenericfor Mapping Mode andMosaicfor Blending Mode.
Final Steps and Exporting
Reducing File Size
- Decimate Mesh: If needed, reduce file size by clicking
Tools > Mesh > Decimate Mesh. Enter the target face count.
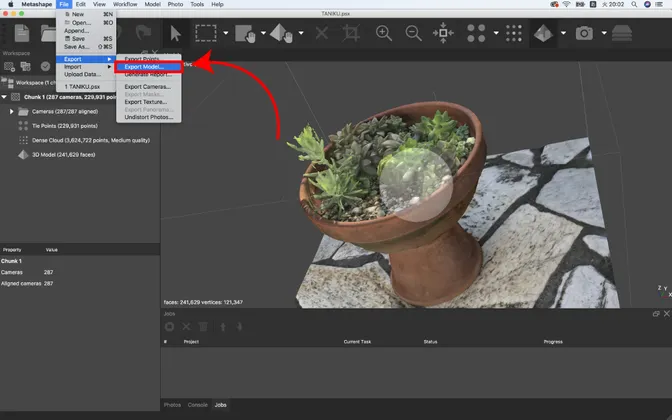
Exporting the Model
- Export Model: Click
File > Export Model. ChooseWavefront OBJas the file type and ensure all export parameters are set correctly.
Conclusion
That’s it for our beginner’s guide to 3D modeling in Agisoft Metashape. Practice these steps to improve your skills, and refer to the User Manual for detailed guidance. Thanks for reading, and happy modeling!
Published on 15/11/2023,
last updated on 05/12/2023